Reviewing and Updating Your Custom Rates
See every client on a custom rate, then update, replace, or remove them in bulk.
Written By Lucas Steflor
Last updated 6 months ago
Custom rates give specific clients their own price for a service. Once you've set a few, you'll want a place to see who's on what rate, bump a group up when you raise defaults, or phase out an old tier you no longer want.
The Custom rates view does all of that in one place.
It's the right tool for:
Seeing every client who pays a custom rate, grouped by service
Bumping a grandfathered group up partway when you raise defaults again
Phasing out an old grandfathered tier so those clients pay your current default
For setting up a single client's custom rate, see the Setting a Custom Rate for a Specific Client article. For raising your default rates and grandfathering existing clients in one pass, see Raising or Changing Your Default Prices .
Where to Find It
From Services, click Update Prices in the top right, then pick Manage custom rates. The number next to the menu item is your current count.
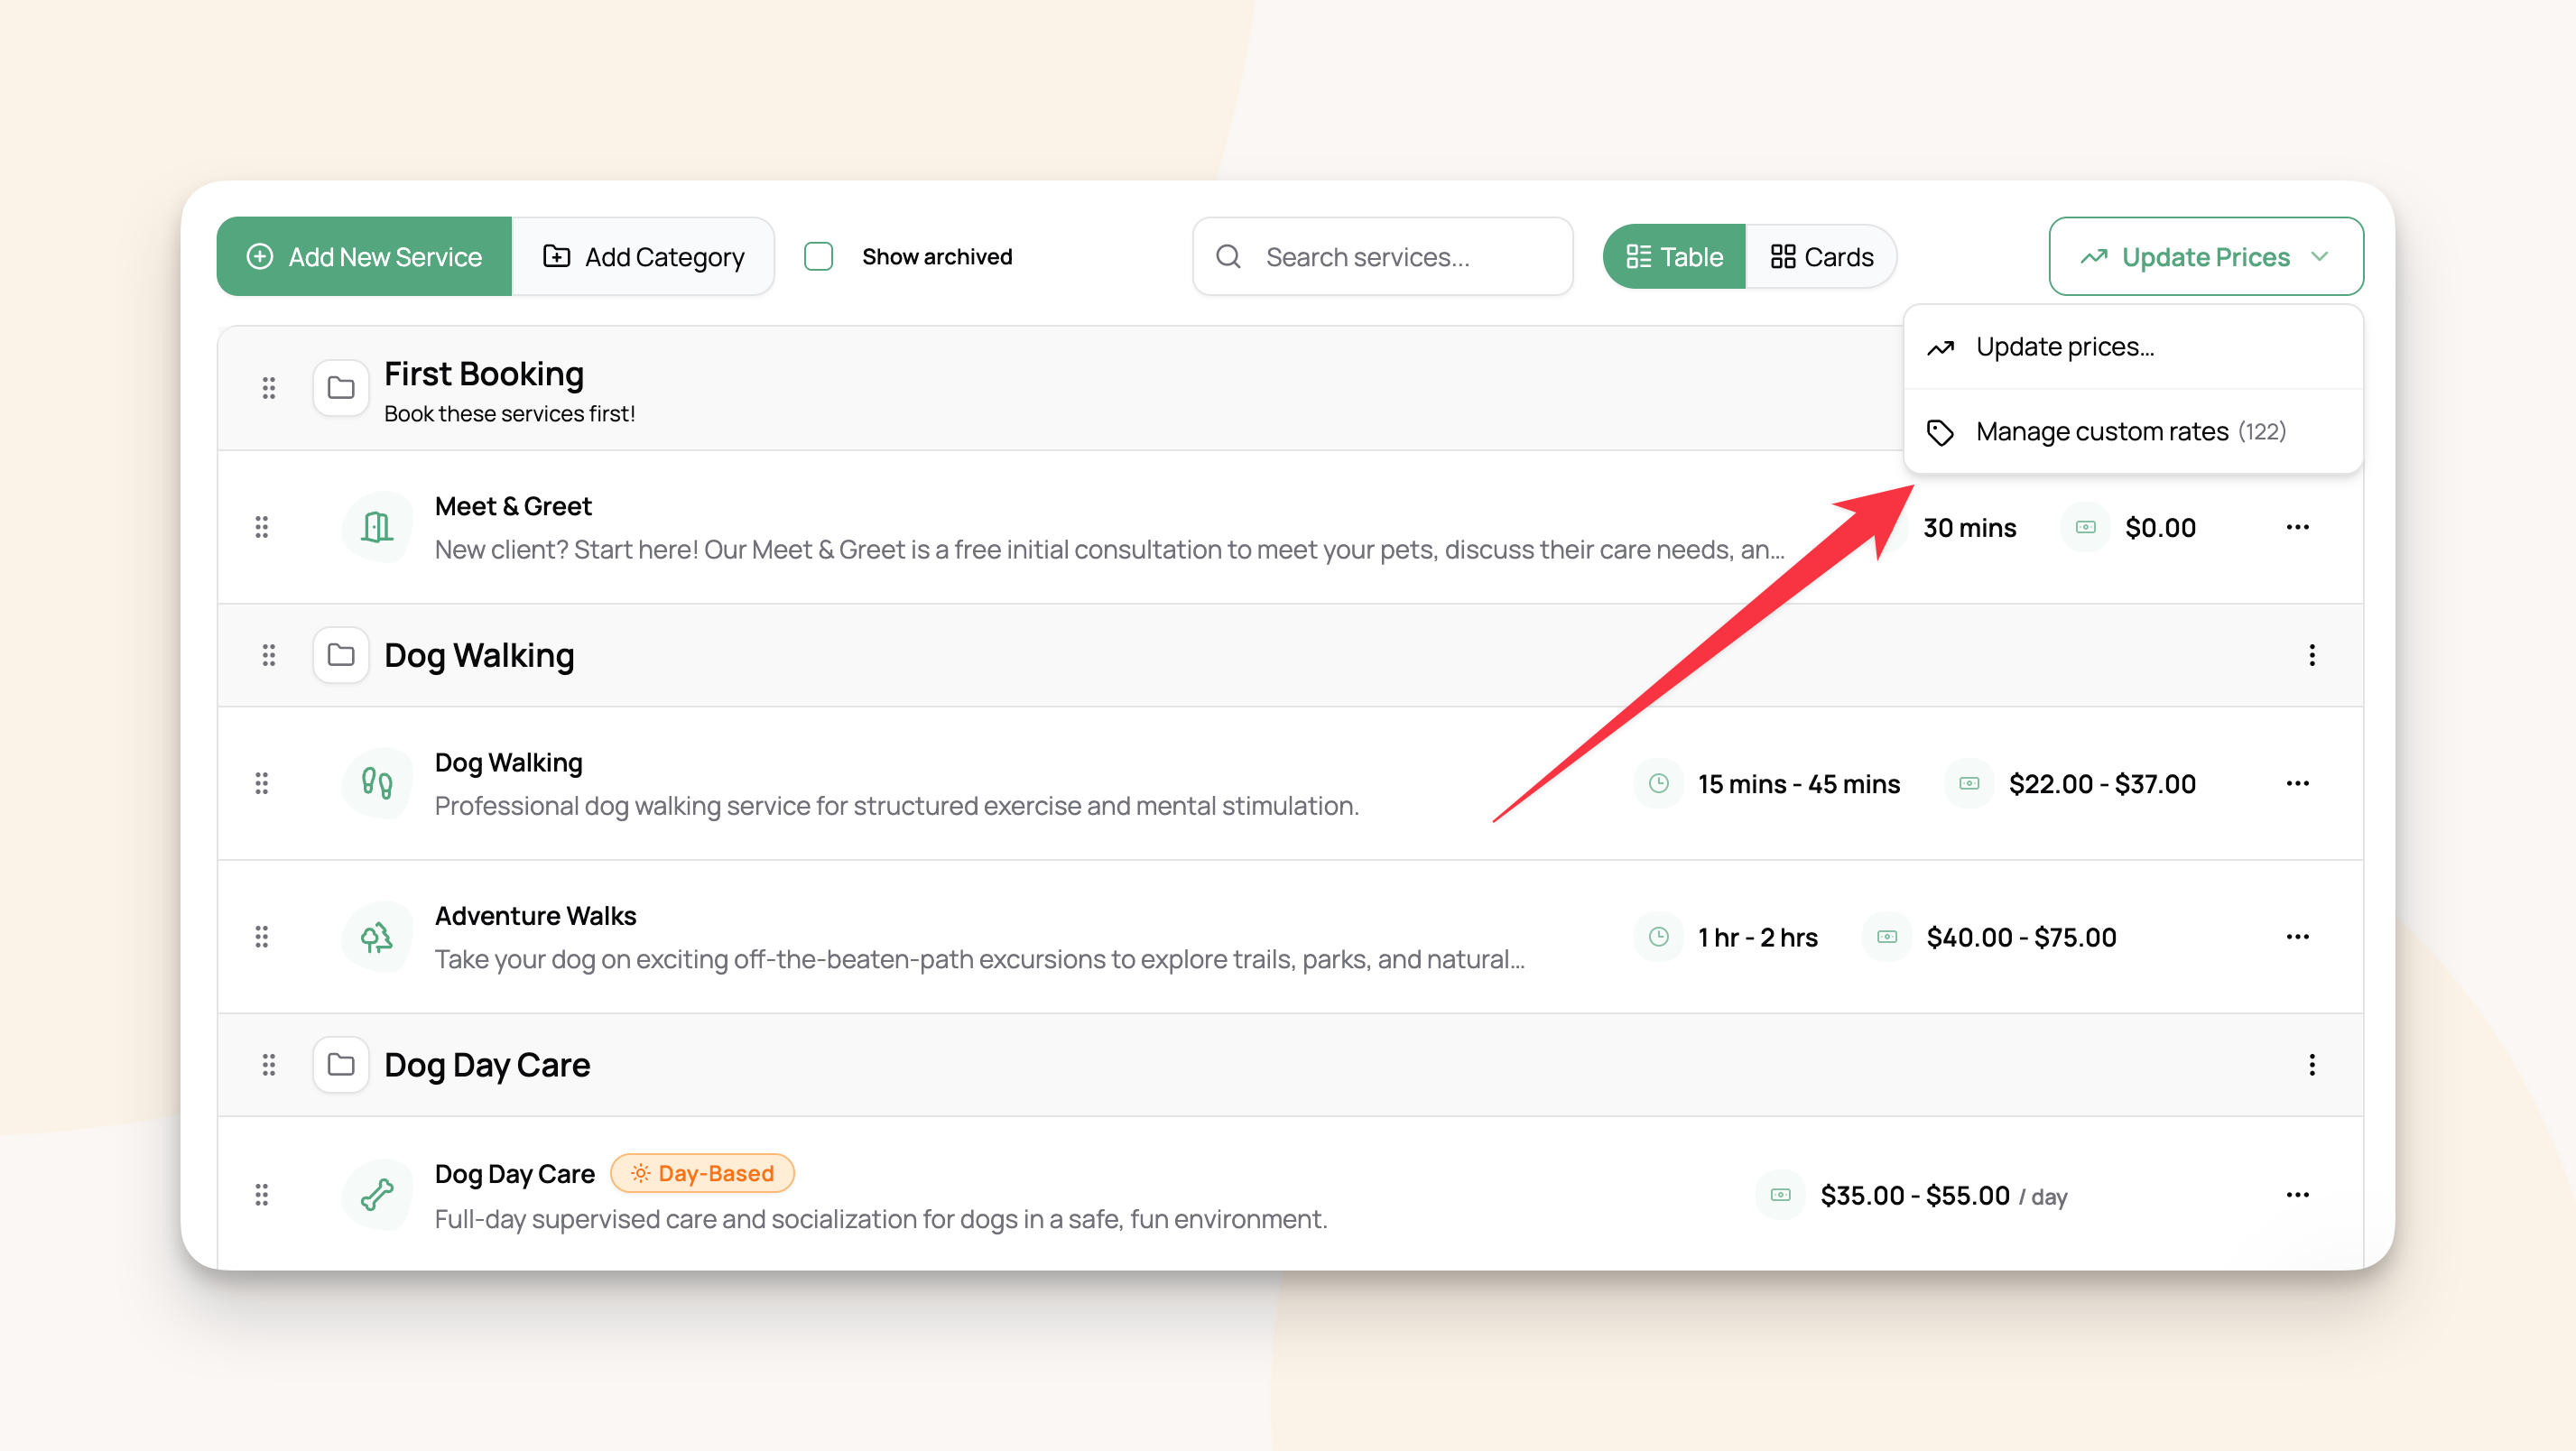
The Walk-Through
One running scenario:
You have three custom-rate tiers on your 30-minute walk: 30 grandfathered clients at $20, 4 friends-and-family clients at $18, and 2 corporate clients on a $35 premium. Your default is $25. You want to bump the $20 tier to $23 and remove the $18 tier so those clients pay your $25 default. The $35 corporate tier stays where it is.
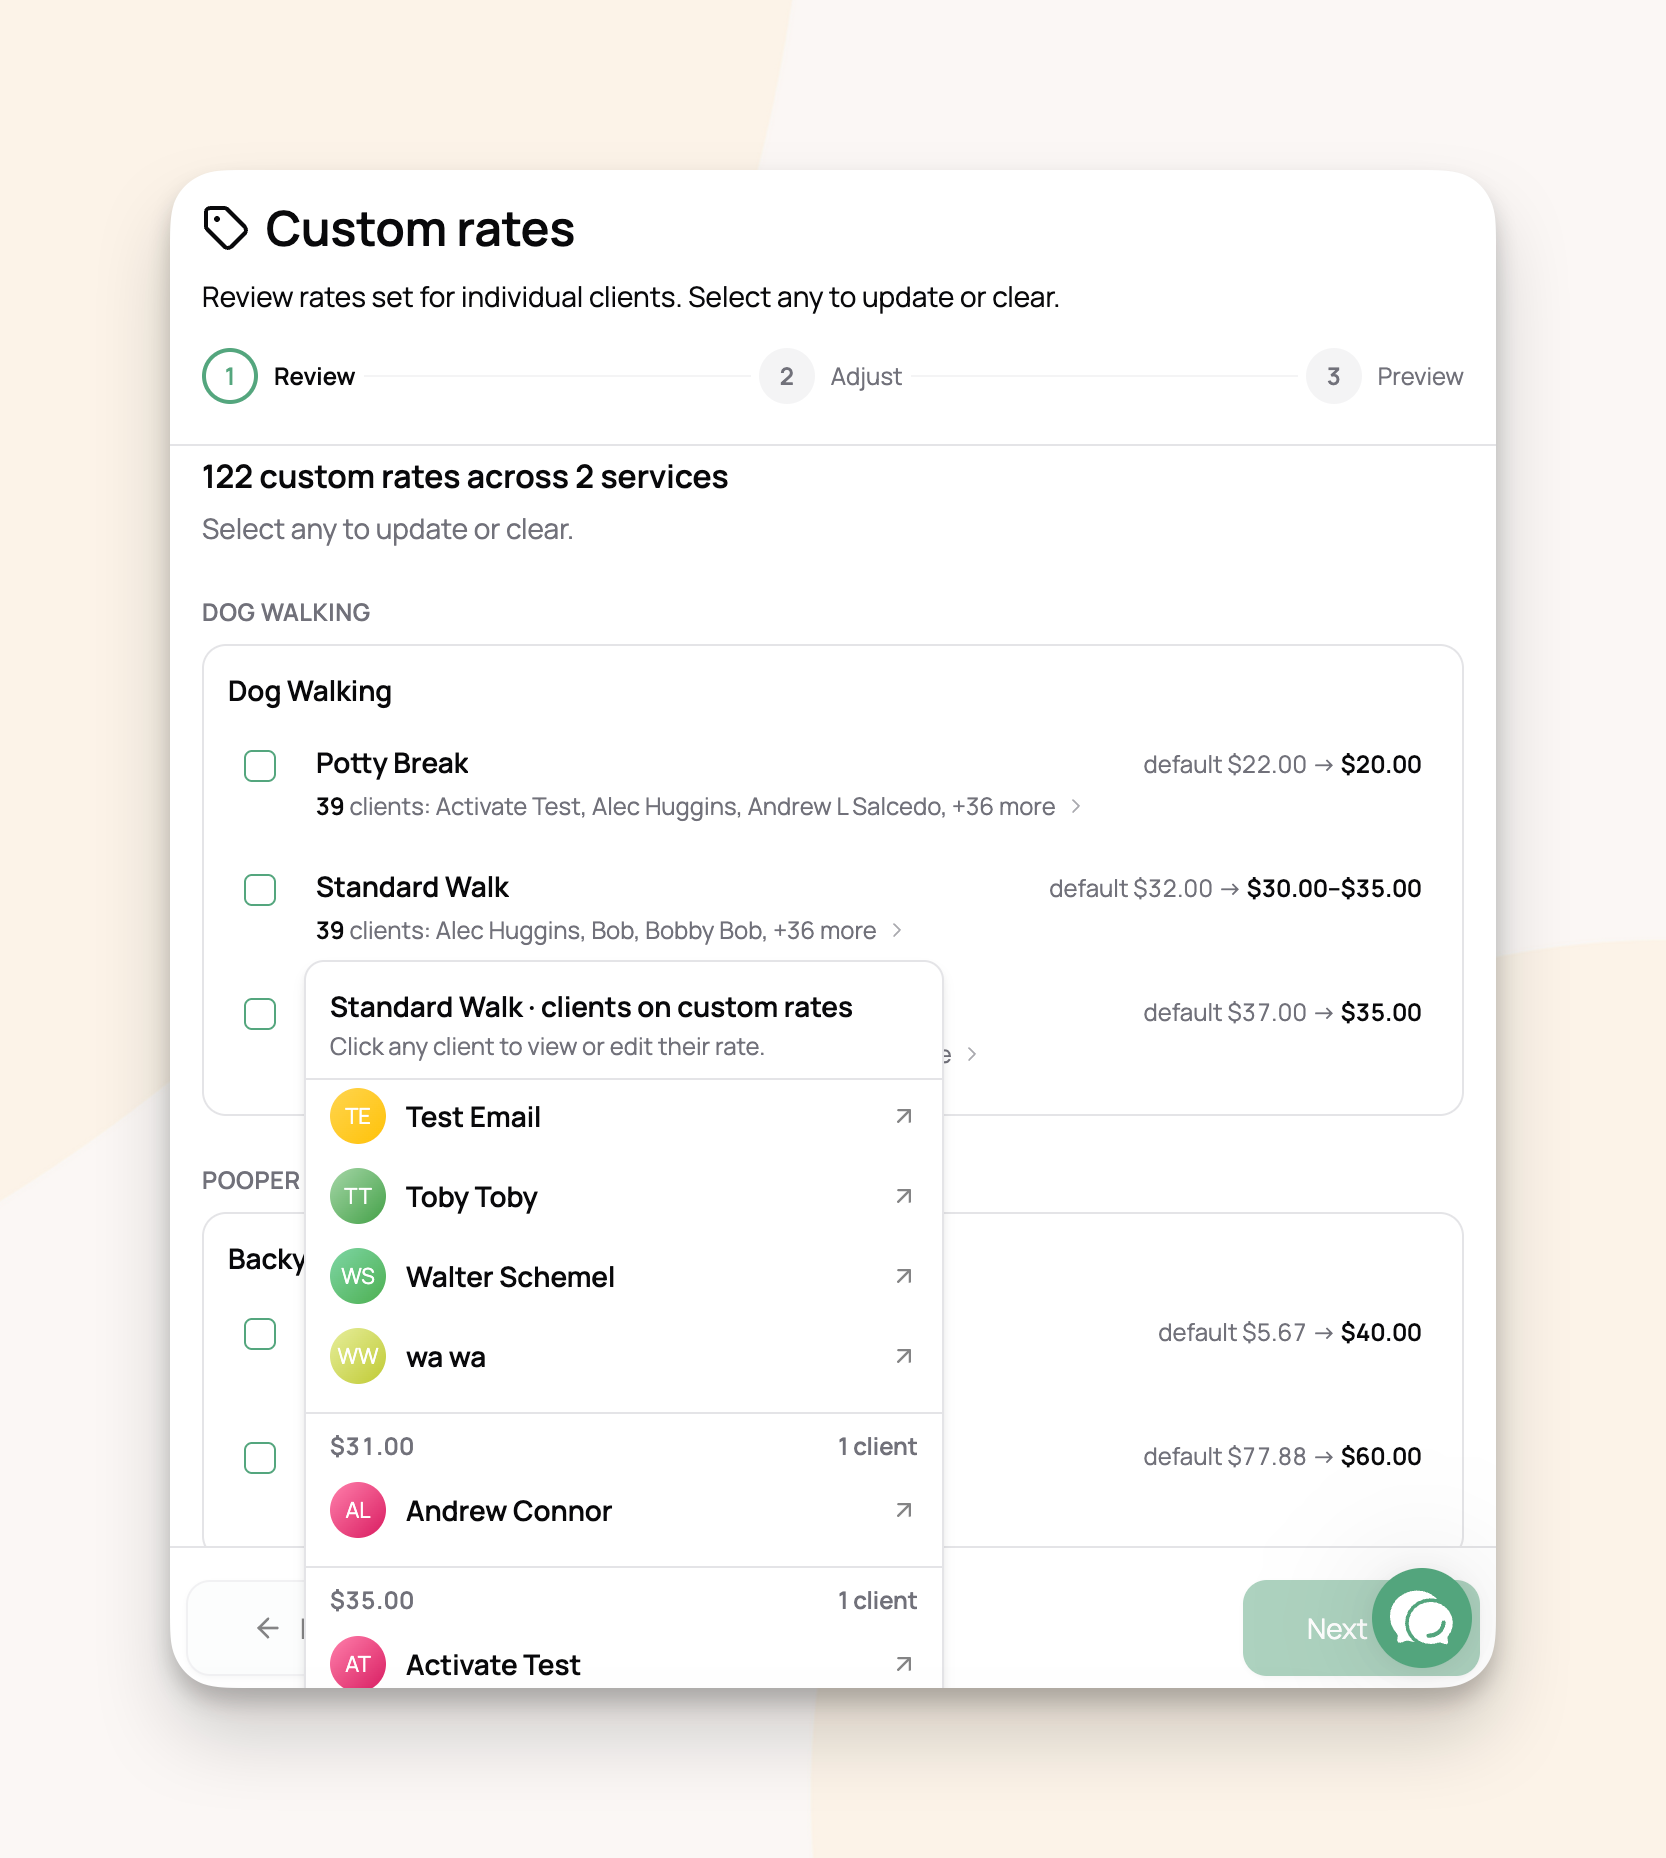
Step 1: Review. The first screen lists every service with at least one custom rate. For each pricing option you'll see your default, a range of the custom rates set (for example, "default $25 → $18-$35"), and a clickable client count.
Click the client count to pop the full list of clients on that pricing option. Click any name to jump to their profile and edit their rate one-on-one if you prefer.
Tick the checkbox on each pricing option you want to change. For our scenario, we tick the 30-minute walk.
Step 2: Adjust. Each pricing option you ticked expands into one row per unique custom rate (a "tier"). Pick an action per tier:
For example: On the $20 tier we pick Change to a new rate with $23. On the $18 tier we pick Reset to default. The $35 tier stays on Keep current rate.
A Drop all custom rates link at the top removes every custom rate on the services you ticked. Use it when you're ending a grandfathering arrangement entirely.
Step 3: Preview. A summary of every change: from rate, to rate, and how many clients are affected. Click Update N rates to apply.
If any of the affected clients have upcoming bookings on those services, you'll see a checkbox: Also re-price N upcoming bookings at the new rates. Check it to update those bookings and any draft invoices they sit on.
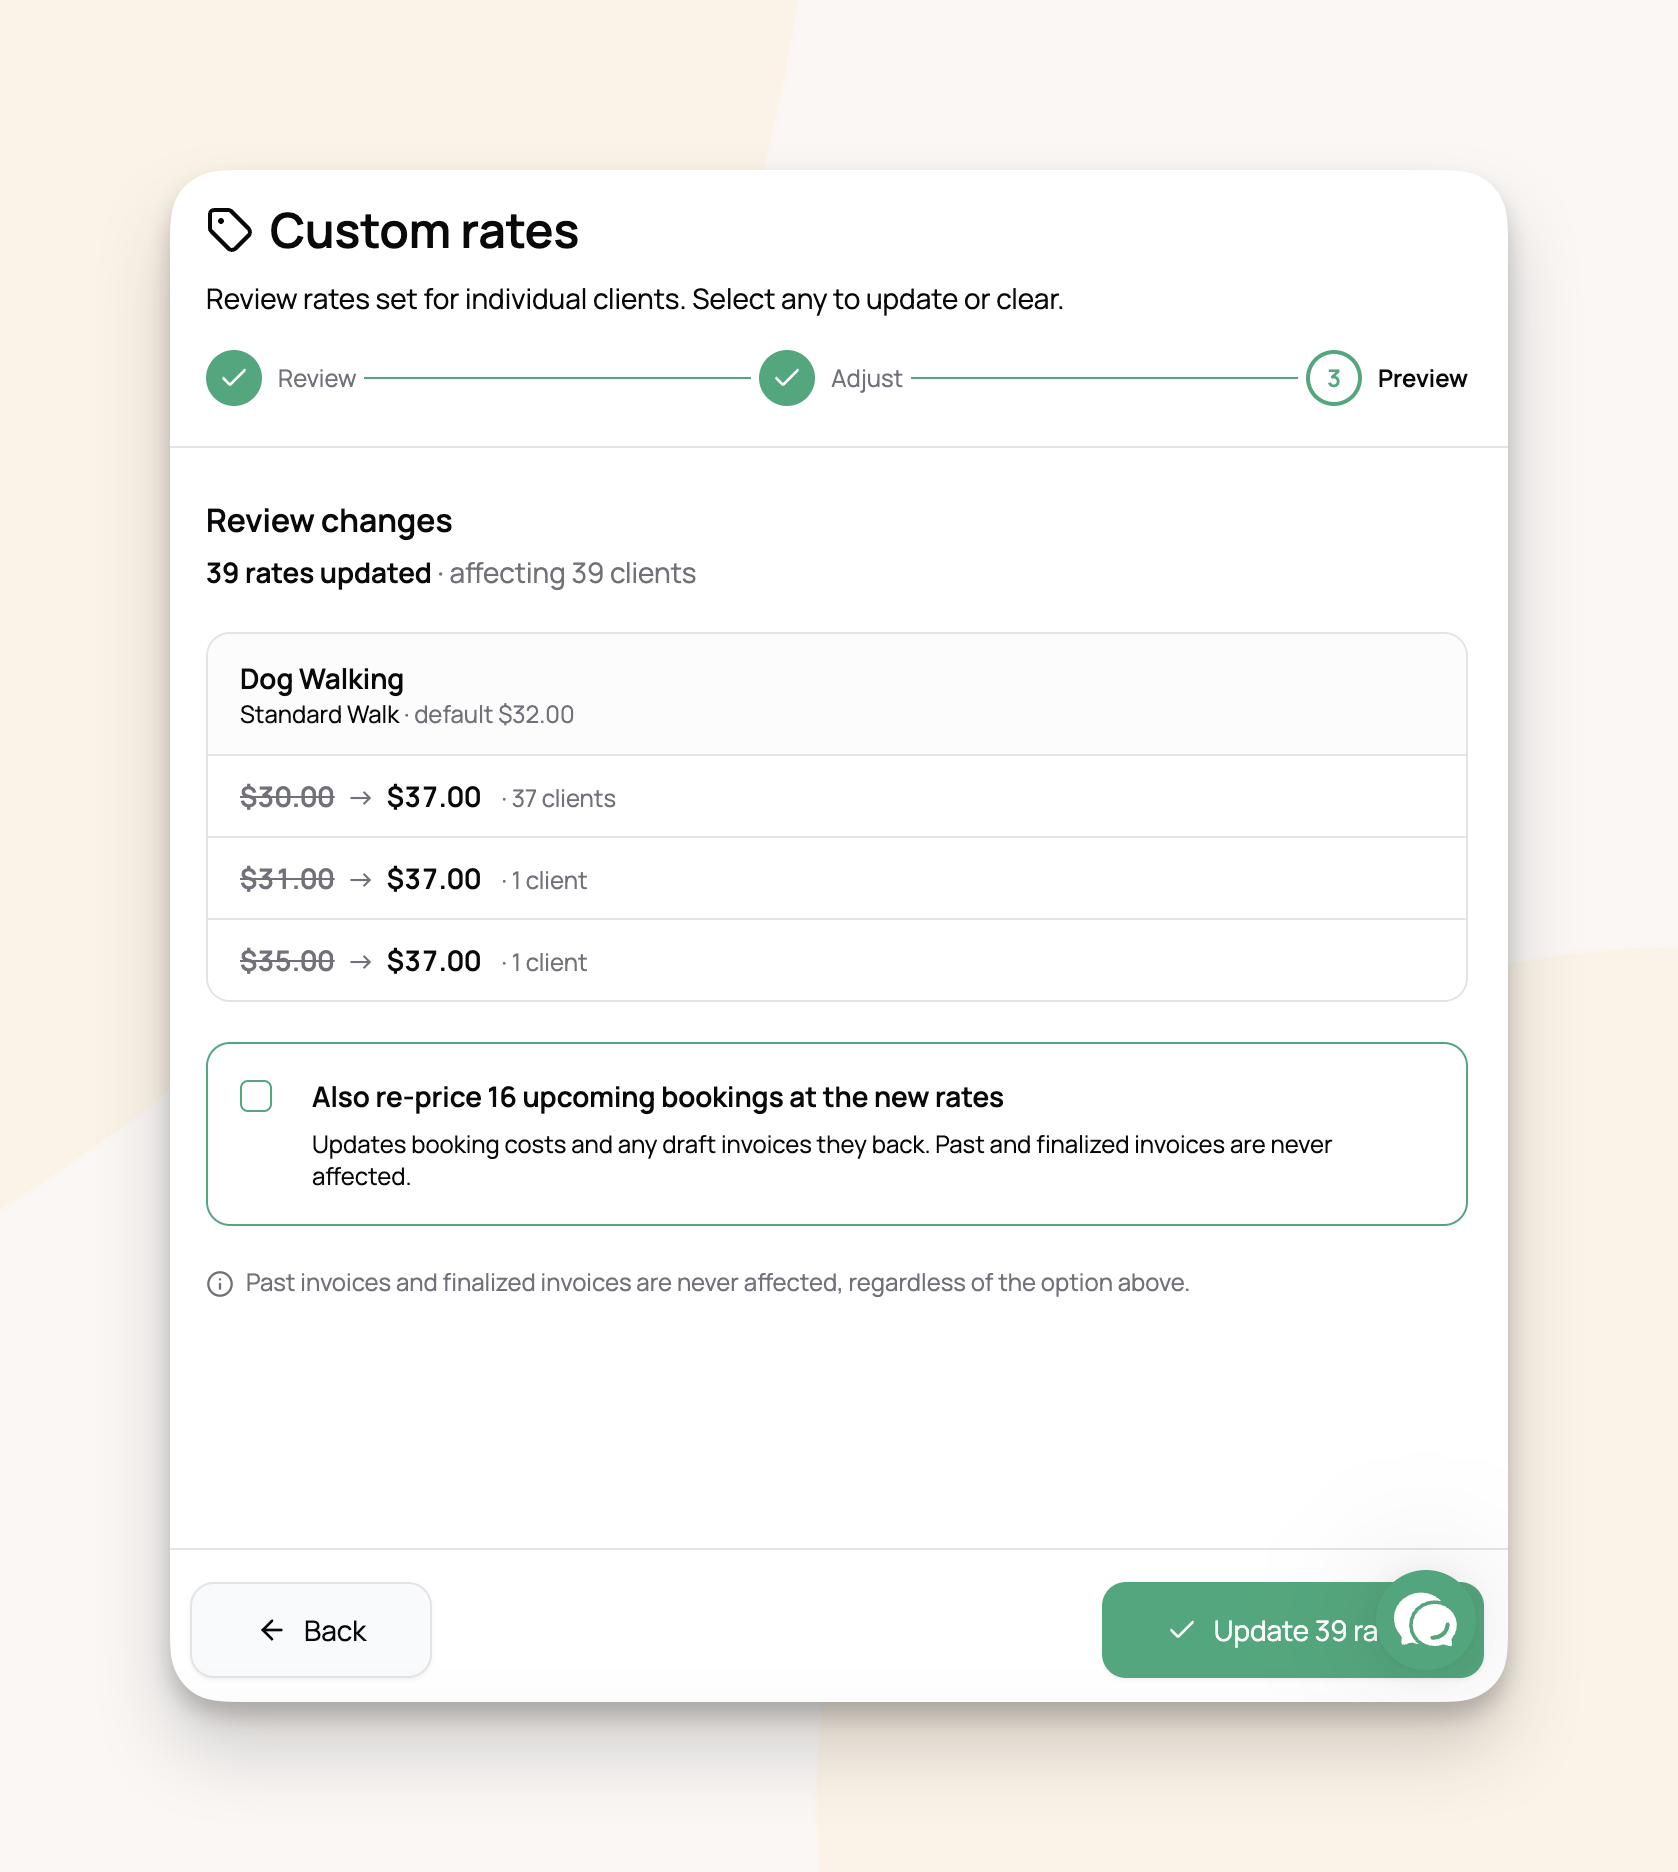
‼️ Heads up: When you check "re-price upcoming bookings," any manual line-item edits you've made on those clients' draft invoices get overwritten. If you've hand-tweaked a price on a draft, leave the box unchecked.
Past and finalized invoices are never touched, with or without the checkbox.
Frequently Asked Questions
Why don't I see all my services in Step 1?
Why don't I see all my services in Step 1?
The Review step only lists services with at least one custom rate. If a service is missing, no client has a custom rate for it.
Can I update some custom rates at the same price but not others?
Can I update some custom rates at the same price but not others?
Not from this view. Click a client name in Step 1 to jump to their profile, then edit them individually from the Rates tab.
What happens if I "Reset to default" on a client whose only custom rate was for this service?
What happens if I "Reset to default" on a client whose only custom rate was for this service?
They simply pay your current default. Their profile no longer shows them as overridden on that pricing option.
What if I want to update everyone, not just clients with existing custom rates?
What if I want to update everyone, not just clients with existing custom rates?
Use Update Prices instead. See the Raising or Changing Your Default Prices article.
Can I undo this?
Can I undo this?
Not in one click. Run the tool again with the inverse changes (set $23 back to $20, recreate the $18 tier on each client's profile, and so on). For surgical rollbacks, edit affected clients individually.
Was this helpful?
Still need help? Ask the team